Skip to Main Content

Infrastructure Software

Announcement

For appeals, questions and feedback about Oracle Forums, please email oracle-forums-moderators_us@oracle.com. Technical questions should be asked in the appropriate category. Thank you!

Interested in getting your voice heard by members of the Developer Marketing team at Oracle? Check out this post for AppDev or this post for AI focus group information.

Getting Started: Oracle Linux KVM Image for Oracle Cloud Infrastructure

Julie Wong-OracleApr 25 2018 — edited Nov 20 2019

Introduction

This Getting Started guide outlines the steps to easily and quickly create virtual machines using the packaged tools provided by the Oracle Linux Kernel-based Virtual Machine (KVM) image for Oracle Cloud Infrastructure (OCI). KVM provides a set of modules that enable you to use the Oracle Linux kernel as a hypervisor and is built into the Oracle Linux Unbreakable Enterprise Kernel (UEK) by default.

Oracle Linux KVM is available for deployment from the Oracle Cloud Marketplace and the OCI Oracle Images catalog. This Oracle packaged image simplifies the deployment of virtual machines (VMs) by integrating with services such as block storage and virtual network interfaces through the use of scripted tools, including oci-utils. These tools include support for defining the VM guest domain, allocating a specific block device or VNIC and launching and removing VMs on Oracle Cloud Infrastructure.

What’s New

Release 1.5

  • Updated base OS to Oracle Linux 7.7
  • Support for OCI AMD bare metal (BM) shapes
  • Support for nested virtualization on OCI Intel based virtual machine (VM) shapes
  • New KVM utilities for Oracle Cloud Infrastructure provided in this release are:
    • oci-kvm create-network
      • Creates a VNIC virtual network for a KVM guest. Creates a bridged libvirt network on top of a VNIC, allowing a single VNIC to be shared among multiple guests.
    • oci-kvm delete-network
      • Deletes a VNIC virtual network for a KVM guest.
    • oci-kvm create-storage-pool
      • Creates, mounts and configures a file system on a block storage device or storage allocated on the Oracle Cloud File Storage Service on Oracle Cloud Infrastructure. Enables the use of a single block disk to host several guest disks.

Release 1.4

  • Support for VNIC creation via oci-network-config --create-vnic
  • Support for block device creation via oci-iscsi-config --create-volume
  • Virtual Function network interfaces are now fully configured using the native Oracle Linux systemd LSB networking (ifcfg network configuration files)
  • Updated to oci-utils version 0.6
  • Updated to the Oracle Linux 2018-05-08 base image

Prerequisites

If you are new to Oracle Cloud Infrastructure, review the Getting Started section in the Oracle Cloud Infrastructure documentation.To use the Oracle Linux KVM image, it must be deployed on an Oracle Cloud Infrastructure Compute instance. The following OCI compute shapes are supported (list and specifications subject to change without notice):

  • BM.Standard2.52 - 2.3 GHz Intel® Xeon® E5-2699 v3
  • BM.Standard.E2.64- 2.0 GHz AMD EPYC 7551
  • BM.DenseIO2.52 - 2.0 GHz Intel® Xeon®Platinum 8167M
  • VM.Standard2.*- 2.0 GHz Intel® Xeon® Platinum 8167M
  • VM.DenseIO2.* - 2.0 GHz Intel® Xeon®Platinum 8167M

Familiarity with managing virtual machine guests using libvirt, in particular virsh and virt-install, is helpful.

Creating an Oracle Linux KVM Instance

Method 1: Click to Launch using the Oracle Cloud Marketplace

Oracle Cloud Infrastructure provides ready access to the Oracle Linux KVM image for fast and easy deployment using the embedded Marketplace in OCI. You can launch Oracle Linux KVM instances directly from the Marketplace on your Oracle Cloud Infrastructure Compute instance. The fastest method to deploy the Oracle Linux KVM Image on OCI is using the embedded Marketplace in OCI. With a few easy clicks, you can get your Oracle Linux KVM instance up and running.

Follow the instructions below to launch a KVM instance using the Marketplace in OCI:

1. Login to your OCI console. To access the Marketplace from the OCI Console, click on the top left navigation menu. Then, under Solutions and Platform, go to Marketplace.

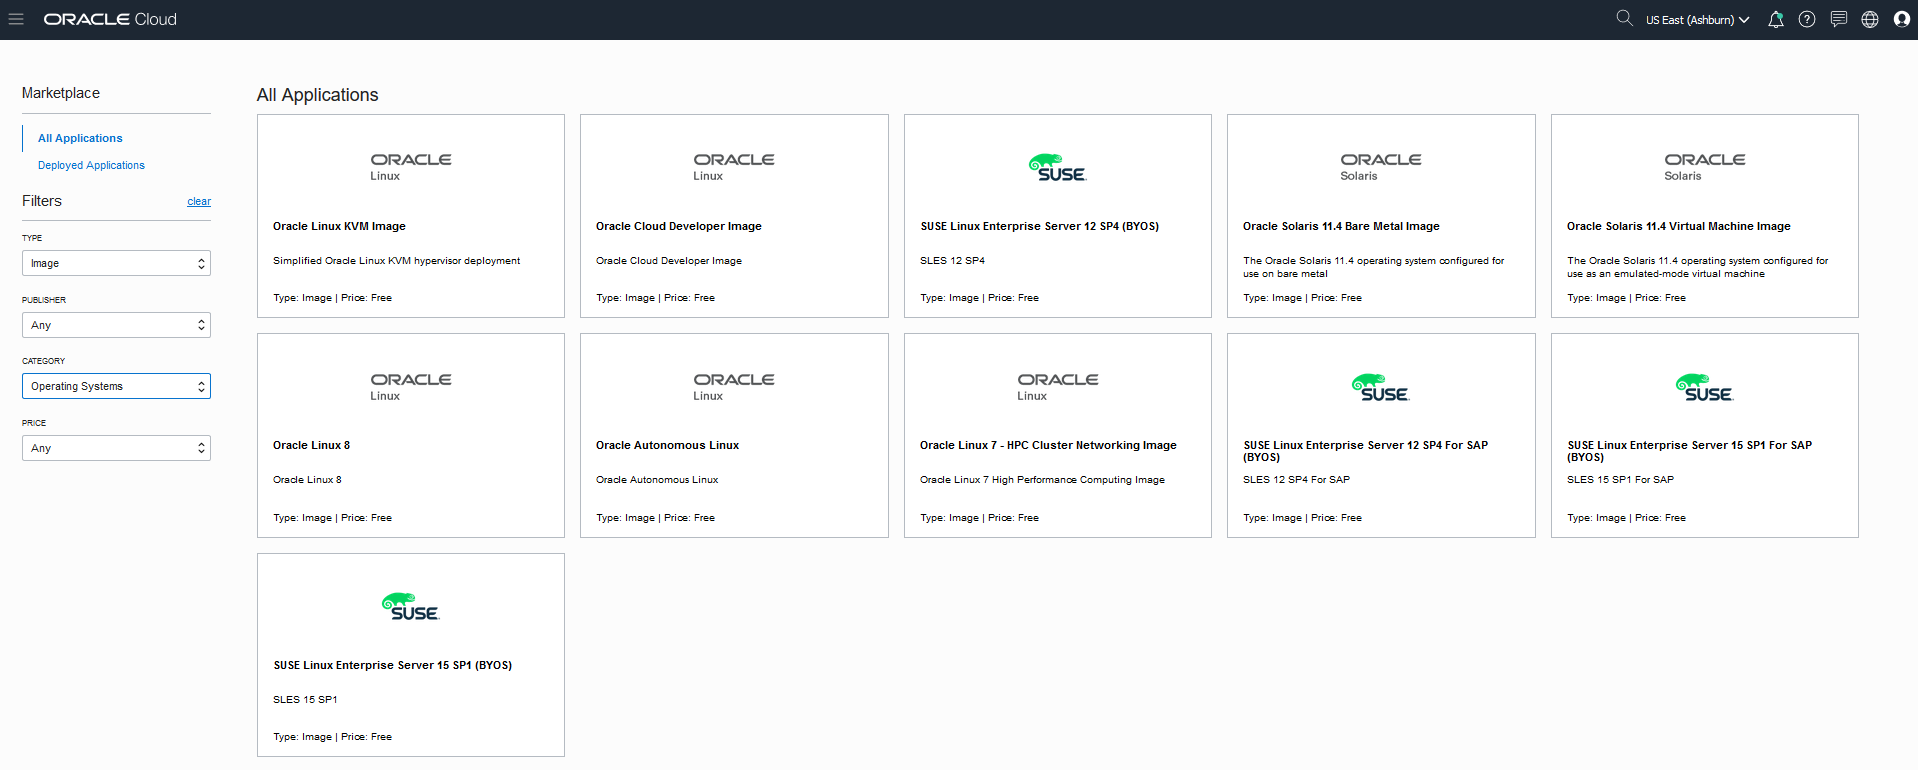
2. Under the Category filter, select Operating Systems. Select the Oracle Linux KVM Image application from the Marketplace.

pastedImage_1.png

3. The Oracle Linux KVM Image page displays overview details about the application, and provides useful links to documentation and resources, and usage information on how to access the KVM instance on OCI. Select the Version of the image, the Compartment in which you wish to deploy the image, and accept the Oracle Standard Terms and Restrictions. Click on the Launch Instance button.

pastedImage_5.png

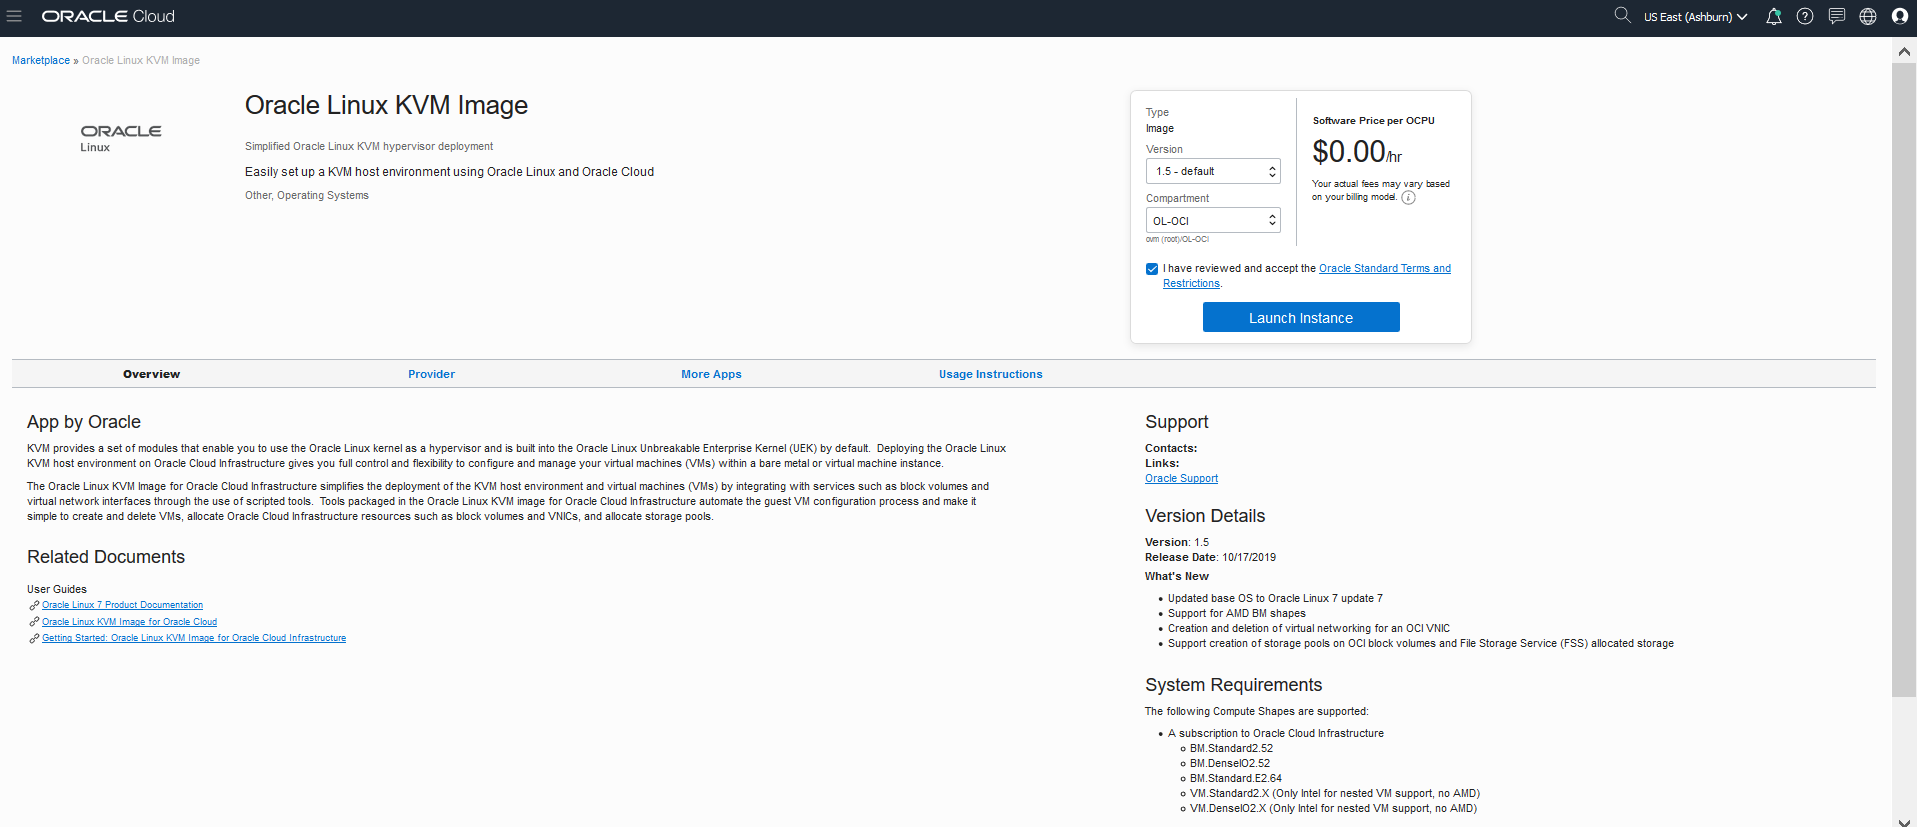
4. Select the version of the image and the compartment in which you wish to deploy the image, and accept the terms of usage. Click on the Launch Instance.

5. The Create Compute Instance window is automatically pre-populated with the KVM image source and instance configuration details. You may modify any instance configuration details in this window:

Launch the KVM instance with the following options:

  • Choose instance type: Select Virtual Machine or Bare Metal Machine
  • Choose instance shape: Click on Change Shape and select the compute shape to deploy the image on.
  • Add SSH Keys: You must provide the SSH Keys information.
  • Configure networking: Configure your Virtual Cloud Network information.

Click on Create Instance to immediately deploy your KVM instance.

Get Started Create 1.JPG

**Method 2: Creating the Instance from OCI Provided Oracle Images (Image Catalog)
**

Use the following instructions to create a KVM instance from the Oracle Images Catalog in OCI.

  1. Login to your Oracle Cloud Infrastructure account.
  2. From the Main Menu, under Core Infrastructure, go to Compute, select Instances, and click on Create Instance to provision the KVM instance. You may also select Create a VM instance under Quick Links from the OCI home page to navigate to the Create Instance page.
  3. Launch the KVM instance with the following options:
    • Choose an operating system or image source: Click on Change Image Source, and under the Oracle Images category, select Oracle Linux KVM Image. Confirm that you have reviewed and accept the Oracle Standard Terms and Restrictions. Click on Select Image.

pastedImage_17.png

  • Choose instance type: Select Virtual Machine or Bare Metal Machine

  • Choose instance shape: Click on Change Shape and select the compute shape to deploy the image on.

  • Add SSH Keys: You must provide the SSH Keys information.

  • Configure networking: Configure your Virtual Cloud Network information

    1. Click on Create.

For more information, go to: https://docs.us-phoenix-1.oraclecloud.com/Content/Compute/Tasks/launchinginstance.htm.

Accessing the Oracle Linux KVM Instance

Connect to the newly provisioned Oracle Linux KVM instance by using an SSH client to access its public IP address. For example:

$ ssh –i <private key> <username>@<public-ip-address>

When you’re logged in as the default user, opc, you can use the sudo command to run administrative tasks.

Preparing to Create a New Virtual Machine

Prior to creating a new virtual machine, take note of what resources are required:

  • Number of CPUs
  • Amount of memory
  • Size of the root disk
  • Subnet

Each guest requires a dedicated OCI block storage device and OCI VNIC to be configured on Oracle Cloud Infrastructure console:

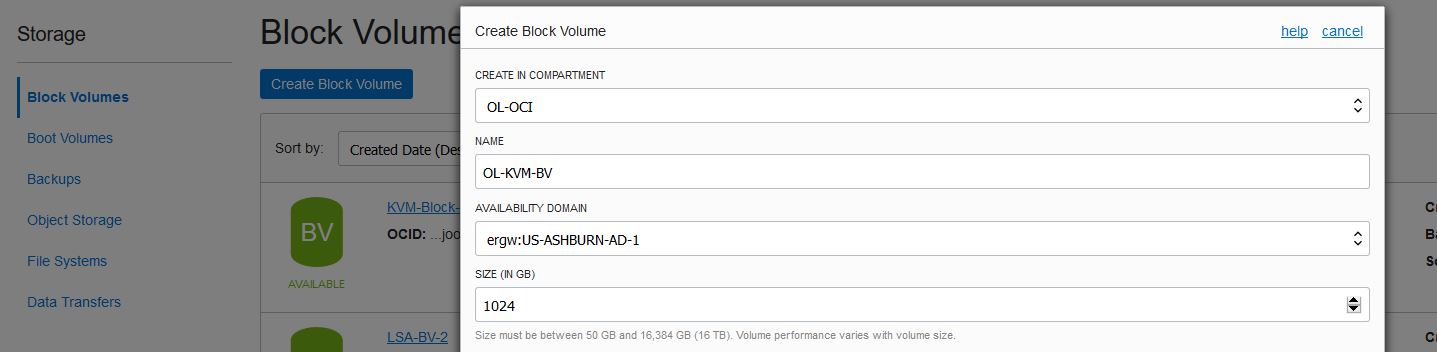
To allocate block storage:

  1. From the Main Menu, under Core Infrastructure, go to Block Storage, Block Volumes, and select Create Block Volume to create your block volumes.

    oci-kvm13-create-bv.JPG

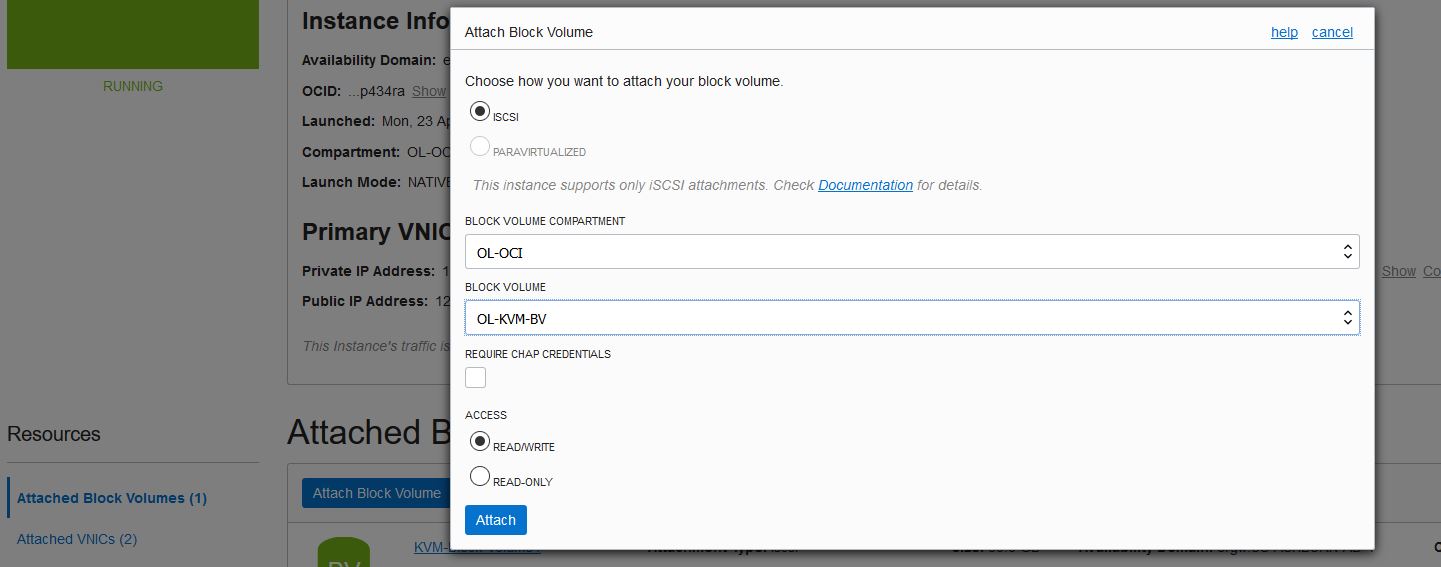
  2. Go to your KVM instance from the Compute tab, and select Attached Block Volumes and click on Attach Block Volume to attach your block volumes as necessary.

    oci-kvm13-Attach-BV.JPG

See https://docs.us-phoenix-1.oraclecloud.com/Content/Block/Tasks/creatingavolume.htm for more information.

To allocate a VNIC:

  1. Go to the Compute tab and select your KVM instance.
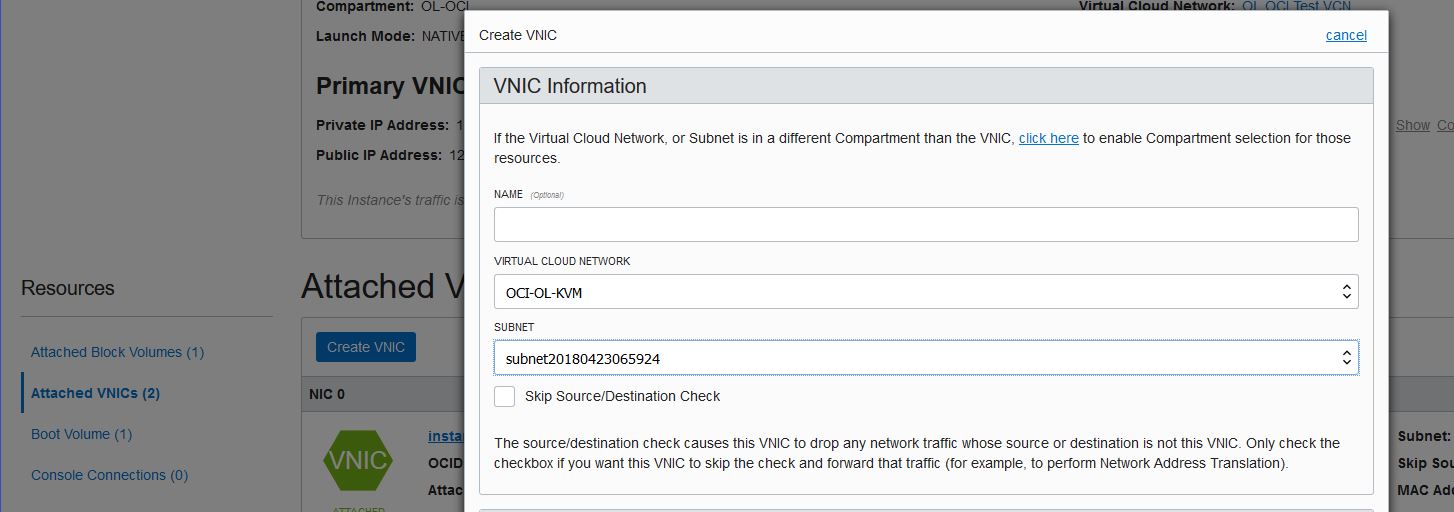
  2. Select Attached VNICs and click on Create VNIC to configure your VNIC.

oci-kvm13-create-vnic.JPG

See https://docs.us-phoenix-1.oraclecloud.com/Content/Network/Tasks/managingVNICs.htm for more details.

Selecting a Storage Device and VNIC (Optional)

You can select a block storage device for your VM:

  1. Run the 'oci-iscsi-config --show' utility to show details for all attached storage attached to your instance.
  2. Choose a device and note the 'Attached device' name.
  3. Add '/dev/' in front of the device name to get the device path (e.g. /dev/sdb)

You can also choose a specific VNIC for your VM:

  1. Go to the KVM instance on the OCI console and inspect the VNIC configuration for the instance.
  2. Choose an appropriate VNIC and note the private IP address

Installing a Virtual Machine

The oci-kvm tool provided with the Oracle Linux KVM image for OCI allows you to create and configure KVM guests on OCI instances that use OCI resources such as block volumes and VNICs. The oci-kvm tool can also remove and deconfigure all system resources assigned to the guest VM and make them available for re-use.

oci-kvm (1) can be used with the following options: -D/--domain, -d/--disk, -n/--net, and -V. The -D/--domain option is required, and specifies the name of guest being created. If a particular block storage device is desired, specify -d/--disk along with the path to the device. If a particular VNIC is desired, specify -n/--net along with the private IP address of the desired VNIC. Every argument that appears after the -V option is provided directly to virt-install(1).

By default, oci-kvm(1) will choose a block storage device and a VNIC and assign both to a virtual machine automatically when there is only one VNIC and one block storage device available. This is also the case where there are multiple VNICs or block storage devices but they are functionally identical, such as when all block storage devices are the same size or all VNICs are on the same subnet. You may also explicitly choose a specific block storage device or VNIC if desired when multiple block volumes and VNICs are available.

The synopsis for oci-kvm is as follows:

  • oci-kvm create -D|--domain NAME [-d|--disk DISK_PATH ] [-n|--net IP ] -V|--virt VIRT-INSTALL_ARGS
  • oci-kvm destroy -D|--domain NAME

Refer to the oci-kvm man page for more details.

An example of an invocation is as follows:

# oci-kvm create -D my_guest -V --vcpus 4 --memory 8192 --boot cdrom,hd --location /mnt/OracleLinux-R7-U4-Server-x86_64-dvd.iso --nographics --console pty,target_type=serial --console pty,target_type=virtio --noautoconsole --os-variant=rhel7 --extra-args "console=tty0 console=ttyS0,115200n8 serial"

This example creates an Oracle Linux 7.4 guest, configured to use a serial console for console output. It is also possible to use other options, such as VNC for console output. If a graphical option is used, it will be necessary to appropriately configure the OCI Security List for the subnet this image is attached to.

Removing a Virtual Machine

Prior to removing a virtual machine, it must first be stopped. To stop a running virtual machine, issue:

virsh destroy <guest>

Once the VM has stopped, it can be permanently destroyed by issuing:

oci-kvm destroy -D <guest>

Invoking this command will undefine the virtual machine in libvirt as well as clean up any host resources that were created for it. The OCI resources that were allocated to the virtual machine are then made available for re-use by new VMs.

Additional Notes

  • On shapes that have an active physical NIC 1, attaching a KVM guest to VLAN 0 is currently not supported (it is fully supported to attach KVM guests to the other VLANs on either physical NIC)

For more information visit:

Comments

Sergei Krasnoslobodtsev

All the parameters/properties  depend on the settings of your domain server.

Secure transmission of user/password is a separate issue...

For example and test:

declare

  retval       PLS_INTEGER;

  i pls_integer;

  my_session dbms_ldap.SESSION;

  my_attrs     DBMS_LDAP.string_collection;

  my_message   DBMS_LDAP.message;

  my_entry     DBMS_LDAP.message;

  entry_index  PLS_INTEGER;

  my_dn        VARCHAR2(256);

  my_attr_name VARCHAR2(256);

  my_ber_elmt  DBMS_LDAP.ber_element;

  attr_index   PLS_INTEGER;

  my_vals DBMS_LDAP.STRING_COLLECTION ;


begin

  my_session := dbms_ldap.init('your ldap server', 389);

  retval := DBMS_LDAP.simple_bind_s(my_session

                                   ,'cn=test,cn=config',

                                   ,'1'

                                   );

IF retval != DBMS_LDAP_UTL.SUCCESS THEN

    -- Handle Errors

    DBMS_OUTPUT.PUT_LINE('unbind_s returns : ' || to_char(retval));

ELSE

    DBMS_OUTPUT.PUT_LINE(': Successful.');

END IF;                                  

  retval := dbms_ldap.search_s(my_session,'DC=corp,DC=test,DC=com', dbms_ldap.SCOPE_SUBTREE,'sAMAccountName='||&your_account,my_attrs,0,my_message);

-- find

retval := DBMS_LDAP.count_entries(my_session, my_message);

DBMS_OUTPUT.PUT_LINE(RPAD('Records ',25,' ') || ': '|| TO_CHAR(retval));

DBMS_OUTPUT.PUT_LINE('---------------------------------------------------');

-- begin

my_entry := DBMS_LDAP.first_entry(my_session, my_message);

entry_index := 1;


while my_entry IS NOT NULL loop

   --curr items

   my_dn := DBMS_LDAP.get_dn(my_session, my_entry);

   DBMS_OUTPUT.PUT_LINE ('        dn: ' || my_dn);

   my_attr_name := DBMS_LDAP.first_attribute(my_session,my_entry,my_ber_elmt);

   attr_index := 1;

   while my_attr_name IS NOT NULL loop

     my_vals := DBMS_LDAP.get_values (my_session, my_entry,my_attr_name);

     if my_vals.COUNT > 0 then

       FOR i in my_vals.FIRST..my_vals.LAST loop

    DBMS_OUTPUT.PUT_LINE('Find      ' || my_attr_name || ' : ' || SUBSTR(my_vals(i),1,200));

       end loop;   

     end if;

     my_attr_name := DBMS_LDAP.next_attribute(my_session,my_entry,my_ber_elmt);

     attr_index := attr_index+1;

--

   end loop;

   my_entry := DBMS_LDAP.next_entry(my_session, my_entry);

   DBMS_OUTPUT.PUT_LINE('===================================================');

   entry_index := entry_index+1;

end loop;


retval := DBMS_LDAP.unbind_s(my_session);

exception when others then

DBMS_OUTPUT.PUT_LINE(' Error code : ' || TO_CHAR(SQLCODE));

    DBMS_OUTPUT.PUT_LINE(' Error Message : ' || SQLERRM);

    DBMS_OUTPUT.PUT_LINE(' Exception encountered .. exiting');

retval := DBMS_LDAP.unbind_s(my_session);


end;

/

Additional examples: DBMS_LDAP

Joe R

Sergey,

Thank you for replying.

I have a question. Is the sAMAccountName (line 30) the username?

Because I only have the First and Last names. I don't have the username.

Can this still work?

Thanks,

Joe

handat

The concept of a 'username' is a bit arbitrary in LDAP. Basically, almost any of a user's attribute can be used as the identifier for authentication provided it is unique and configured to do so. In AD, cn,uid, sAMAccountName (and a few more) are usually configured for that.

Billy Verreynne

How are the LDAP attributes used? Not all organisations use these the same.

Referring to the filter parameter of the DBMS_LDAP.search_st() call below:

Assuming the name attribute is used for firstname and lastname, you can use:

filter => '(&(name=Joe R))'

However, name is not likely unique - so your code needs to be able to deal with multiple unique DNs (distinguished names) in response.

In my company's case, initials are appended to the name, in an attempt to make it unique. So your name attribute would be "Joe R (J)". And a wildcard search filter will be needed as you do not have the full set of initials to append. Thus:

filter => '(&(name=Joe R*))'

Or the name could include first, second, and last names - which means a wildcard is needed for second (and third..) names:

filter => '(&(name=Joe * R))'

Or assuming givenName attribute is used (and matches the firstname you have), you can search on givenName and sn (surname) attributes:

filter => '(&(givenName=Joe)(sn=R))'

Bottom line is that you need to know which LDAP attributes are used, and how they are used, then structure your filter criteria accordingly, potentially using wildcards, and be prepared to get multiple unique result sets (per DN) in response.

Joe R

Billy,

Thank you for replying and the information.

I information I have to use are:

The First Name is the givenName attribute.

The Last Name is the sn attribute.

I'm trying to get:

The Email Address is the mail attribute (if it exists).

The Username is the sAMAccountName attribute.

Thanks,

Joe

Billy Verreynne
Answer

I use a standard LDAP test function, written as a pipeline, for exploring LDAP attributes and searches - and then use the results to determine how to implement that for production use.

Note that I have 2 DNs matching my name (due to business unit moving between companies) - but it does illustrate that your code cannot expect a single hit on given name and surname search.

SQL> create or replace type TStrings is table of varchar2(4000);

  2  /

Type created.

SQL>

SQL> create or replace type TLDAPattr is object( attribute_name varchar2(50), attribute_value varchar2(4000) );

  2  /

Type created.

SQL> create or replace type TLDAPattrList is table of TLDAPattr;

  2  /

Type created.

SQL> create or replace function LDAPattr( filter varchar2, attributes TStrings default null ) return TLDAPattrList pipelined authid definer is

  2 

  3          LDAP_HOST       constant varchar2(256) := '10.20.30.40';

  4          LDAP_PORT       constant varchar2(256) := '389';

  5          -- LDAP credentials

  6          LDAP_USER       constant varchar2(200) := 'username';

  7          LDAP_PASSW      constant varchar2(200) := 'password';

  8          LDAP_ATTR       constant TStrings :=

  9                          new TStrings(

10                                  'sAMAccountName', 'mail', 'mobile', 'telephoneNumber'

11                          );

12 

13          retVal          integer;

14          ldapSession     DBMS_LDAP.session;

15          attrList        DBMS_LDAP.string_collection;

16          valList         DBMS_LDAP.string_collection;

17          ldapMessage     DBMS_LDAP.message;

18          berElement      DBMS_LDAP.ber_element;

19          ldapTimeout     DBMS_LDAP.timeval;

20 

21          attrName        varchar2(256);

22          attrDisplay     varchar2(4000);

23          name            varchar2(256);

24          attrNum         integer;

25          i               integer;

26  begin

27          pipe row(

28                  TLDAPAttr(

29                          'PARAM.<filter>',

30                          filter

31                  )

32          );

33          DBMS_LDAP.USE_EXCEPTION := true;

34 

35          -- create LDAP session

36          ldapSession := DBMS_LDAP.init(

37                  hostname => LDAP_HOST,

38                  portnum  => LDAP_PORT

39          );

40          retval := DBMS_LDAP.simple_bind_s(

41                  ld     => ldapSession,

42                  dn     => LDAP_USER,

43                  passwd => LDAP_PASSW

44          );

45 

46          -- build a distinct ordered list of attributes

47          i := 0;

48          for c in (select distinct column_value as ATTR from table(nvl(attributes,LDAP_ATTR)) order by 1) loop

49                  i := i + 1;

50                  attrList(i) := c.attr;

51                  attrDisplay := attrDisplay || c.attr || ' ';

52          end loop;

53          pipe row(

54                  TLDAPAttr(

55                          'PARAM:<attribute list>',

56                          trim(attrDisplay)

57                  )

58          );

59 

60          -- use supplied filter to search

61          ldapTimeout.seconds := 5;

62          ldapTimeout.useconds := 0;

63          retval := DBMS_LDAP.search_st(

64                  ld => ldapSession,

65                  base => ldap_base,

66                  scope => DBMS_LDAP.SCOPE_SUBTREE,

67                  filter => filter,

68                  attrs => attrList,

69                  attronly => 0,

70                  tv => ldapTimeout,

71                  res => ldapMessage

72          );

73 

74          -- is the search successful?

75          retval := DBMS_LDAP.count_entries(ld => ldapSession, msg => ldapMessage);

76          if retval = 0 then

77                  pipe row(

78                          TLDAPattr(

79                                  'Error',

80                                  'LDAP entries count is 0. No matches found for filter ['||filter||'].'

81                          )

82                  );

83                  retVal := DBMS_LDAP.unbind_s(ld => ldapSession);

84                  return;

85          end if;

86 

87          -- Get all the entries returned by our search.

88          ldapMessage := DBMS_LDAP.first_entry(ld  => ldapSession, msg => ldapMessage);

89 

90          while ldapMessage is not null

91          loop

92                  -- Get all the attributes for this entry.

93                  attrName := DBMS_LDAP.first_attribute(

94                          ld        => ldapSession,

95                          ldapentry => ldapMessage,

96                          ber_elem  => berElement

97                  );

98 

99                  -- output a null row for formatting an empty line between records

100                  pipe row( null );

101 

102                  -- output DN as unique record identifier

103                  pipe row(

104                          TLDAPattr(

105                                  'distinguishedName',

106                                  DBMS_LDAP.get_dn(ldapSession, ldapMessage)

107                          )

108                  );

109 

110                  -- now output attribute name-values found for the DN

111                  attrNum := 1;

112                  loop

113                          exit when attrName is null;

114                          exit when attrNum > attrList.Count;

115 

116                          -- Get all the values for this attribute.

117                          valList := DBMS_LDAP.get_values (

118                                  ld        => ldapSession,

119                                  ldapentry => ldapMessage,

120                                  attr      => attrName

121                          );

122 

123                          name := valList.First;

124                          while name is not null loop

125                                  pipe row(

126                                          TLDAPattr(

127                                                  attrName,

128                                                  valList(name)

129                                          )

130                                  );

131                                  name := valList.Next(name);

132                          end loop;

133 

134 

135                          attrName := DBMS_LDAP.next_attribute(

136                                  ld        => ldapSession,

137                                  ldapentry => ldapMessage,

138                                  ber_elem  => berElement

139                          );

140

141                          attrNum := attrNum + 1;

142                  end loop;

143

144                  ldapMessage := DBMS_LDAP.next_entry(ld  => ldapSession, msg => ldapMessage);

145          end loop;

146

147

148          -- Disconnect from the LDAP server.

149          retVal := DBMS_LDAP.unbind_s(ld => ldapSession);

150

151          return;

152  end;

153  /

Function created.

SQL>

SQL> select

  2          *

  3  from       table(

  4                  LDAPattr(

  5                          filter => '(&(givenName=Billy)(sn=Verreynne))',

  6                          attributes => TStrings('sAMAccountName','mail')

  7                  )

  8  );

ATTRIBUTE_NAME                 ATTRIBUTE_VALUE

------------------------------ ---------------------------------------------

PARAM.<filter>                 (&(givenName=Billy)(sn=Verreynne))

PARAM:<attribute list>         mail sAMAccountName

distinguishedName              CN=Billy Verreynne (B),OU=Developer,...

sAMAccountName                 VerreynneB

mail                           VerreynneB@domain1.com

distinguishedName              CN=Billy Verreynne,OU=Contacts,....

mail                           Billy.Verreynne@domain2.com

9 rows selected.

SQL>

Marked as Answer by Joe R · Sep 27 2020
Joe R

Billy,

Once again thank you very much!!

I did get it to work and I was able to obtain the information needed.

Thanks,

Joe

1 - 7

Post Details

Added on Apr 25 2018
0 comments
8,155 views