Best Of
NetSuite Admin Tips: Customize General Ledger and make Custom Segment as a filter

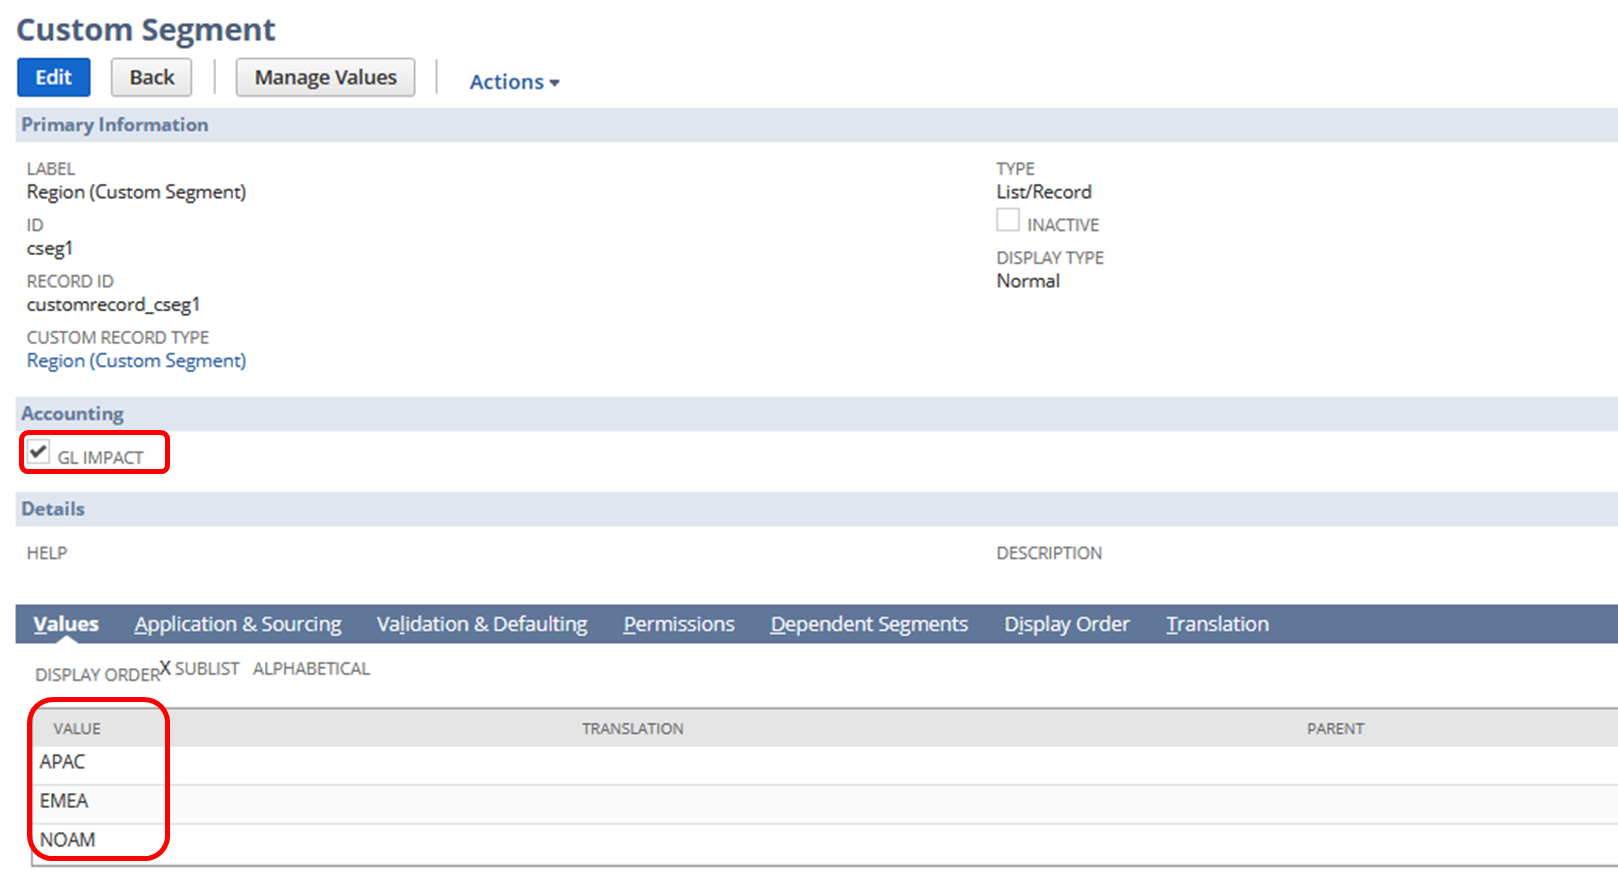
Custom Segments are utilized by NetSuite users to serve as an additional identifier in their transactions. Most of these custom segments are G/L impacting and are needed in analyzing reports such as General Ledger. When running the report, it is helpful to users to show the transactions and balances for a particular segment only, thus filtering the report with ease is necessary.
For example, a user created a custom segment to identify the region of their transactions:
Here's how you can do it:
1.) Navigate to Reports > Financial > General Ledger
2.) Click Customize
3.) Go to Filters section
4.) Add Fields
Expand Financial folder > Custom Segment subfolder > Click Name (You can also add the column using the same steps in the Edit Columns section)
5.) Initially select a segment
6.) Click Show in filter region
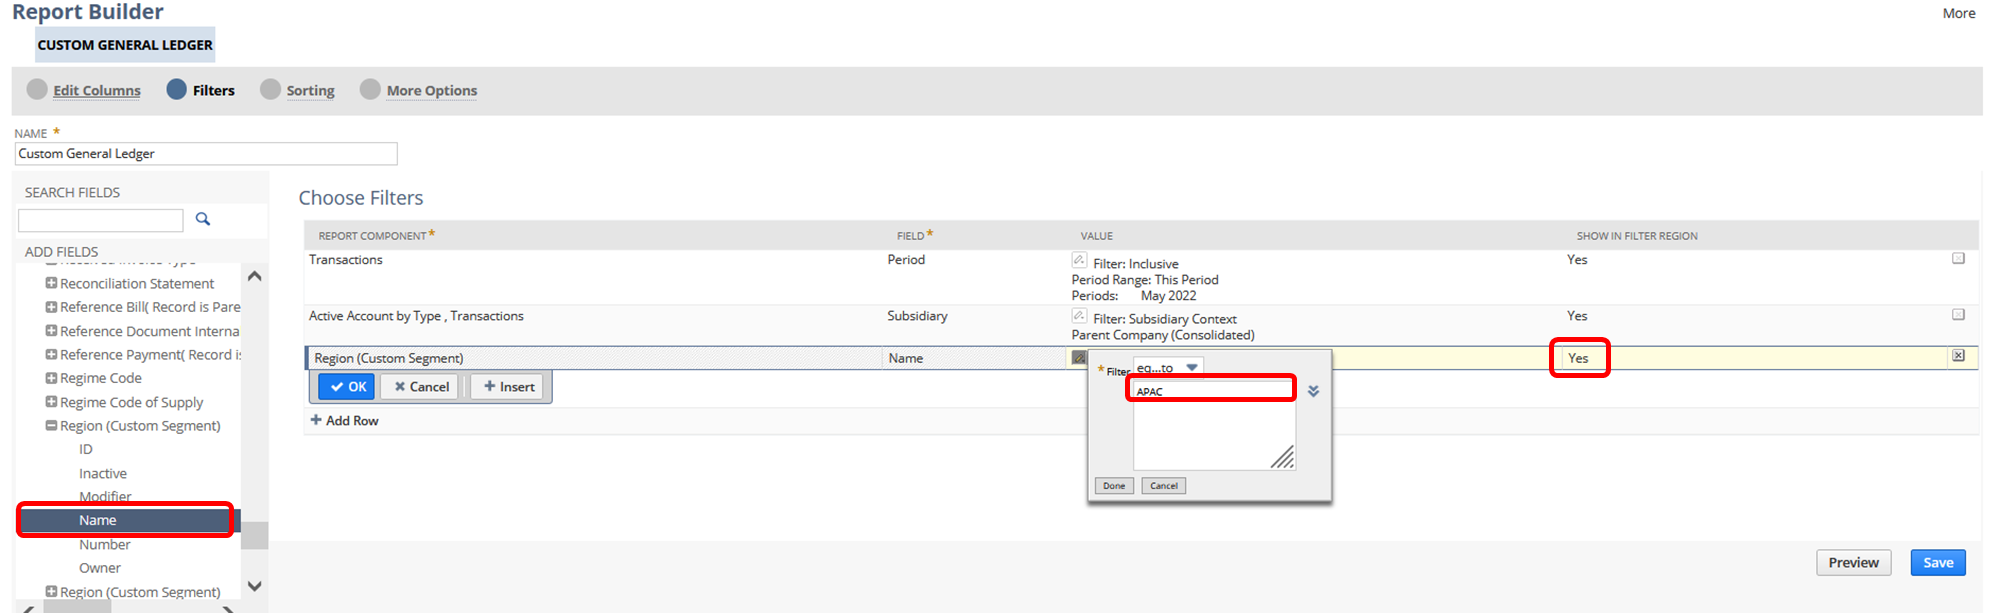
7.) Save and run the report
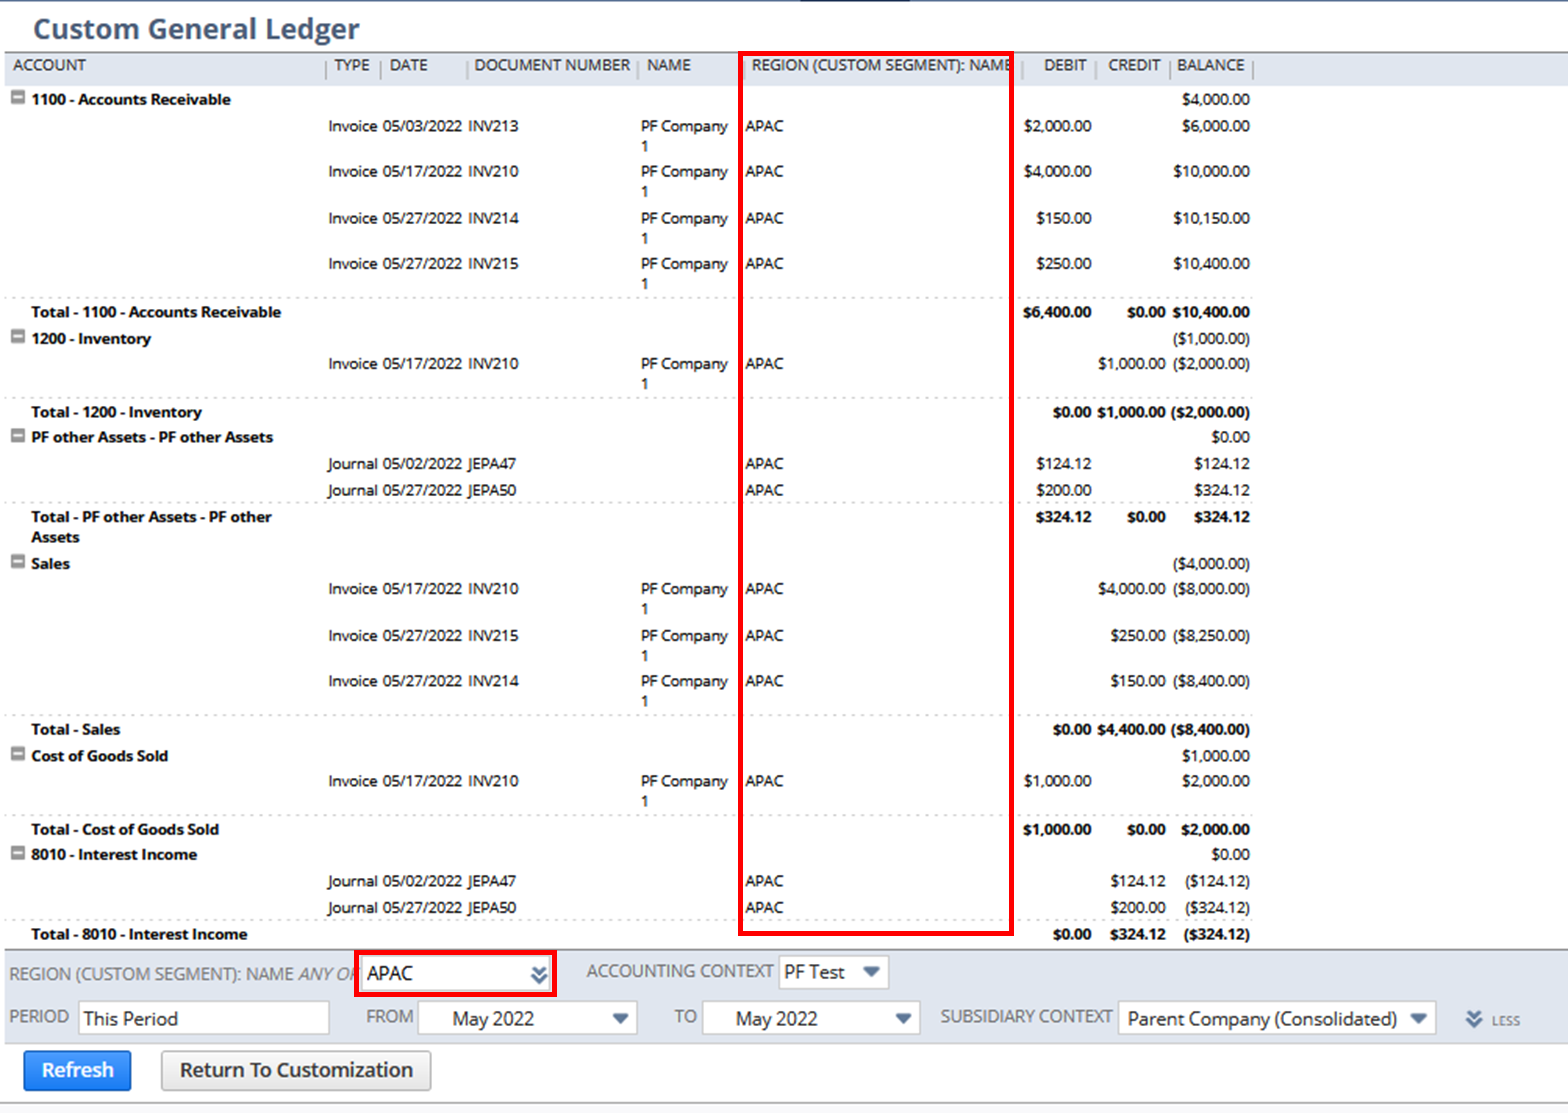
Result:
Users can now filter the transactions by custom segment
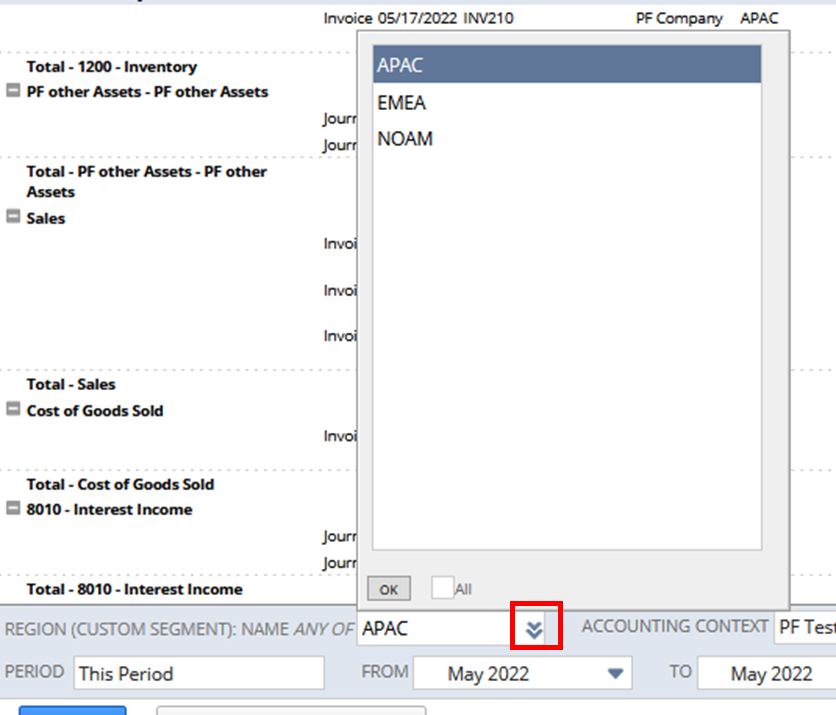
Users can also select the sections easily by clicking the double chevron in the custom segment filter:
Have you tried this report customization? Feel free to share your tips!
Hope this helps

Re: How do I add Tax Code to Deposit form?
Hello @User_L1AA7
Currently, the Tax setup doesn't support the Make Bank deposit transactions. An alternative solution is to Pass the Journals and add required tax codes on line level.

NSC | Show Item Fulfillment Internal ID on Packing Slip printout

Some Customers/Users want to add the Internal ID of the Item Fulfillment to the Packing Slip PDF prints outs. This is achievable through customization.
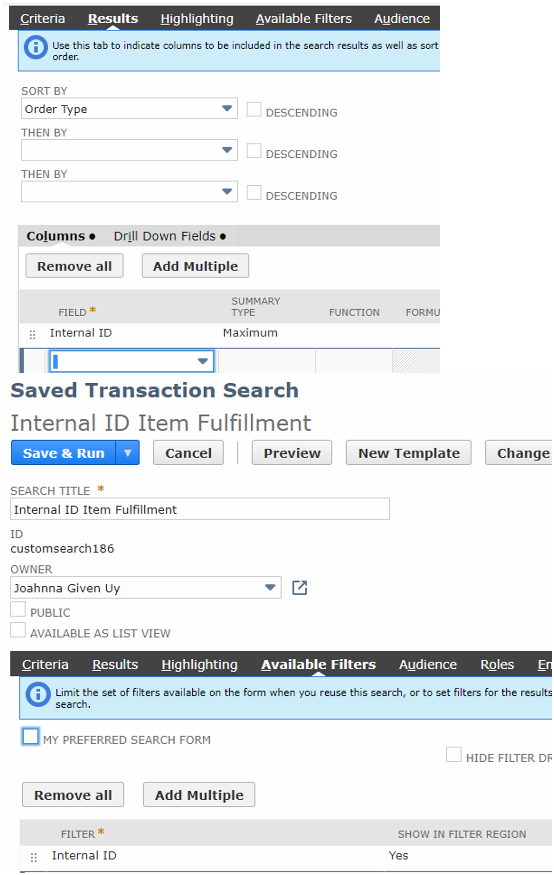
1. Create a Saved Search
1. Navigate to Lists > Search > Saved Searches > New
2. Click on Transaction
3. Set the following setup:

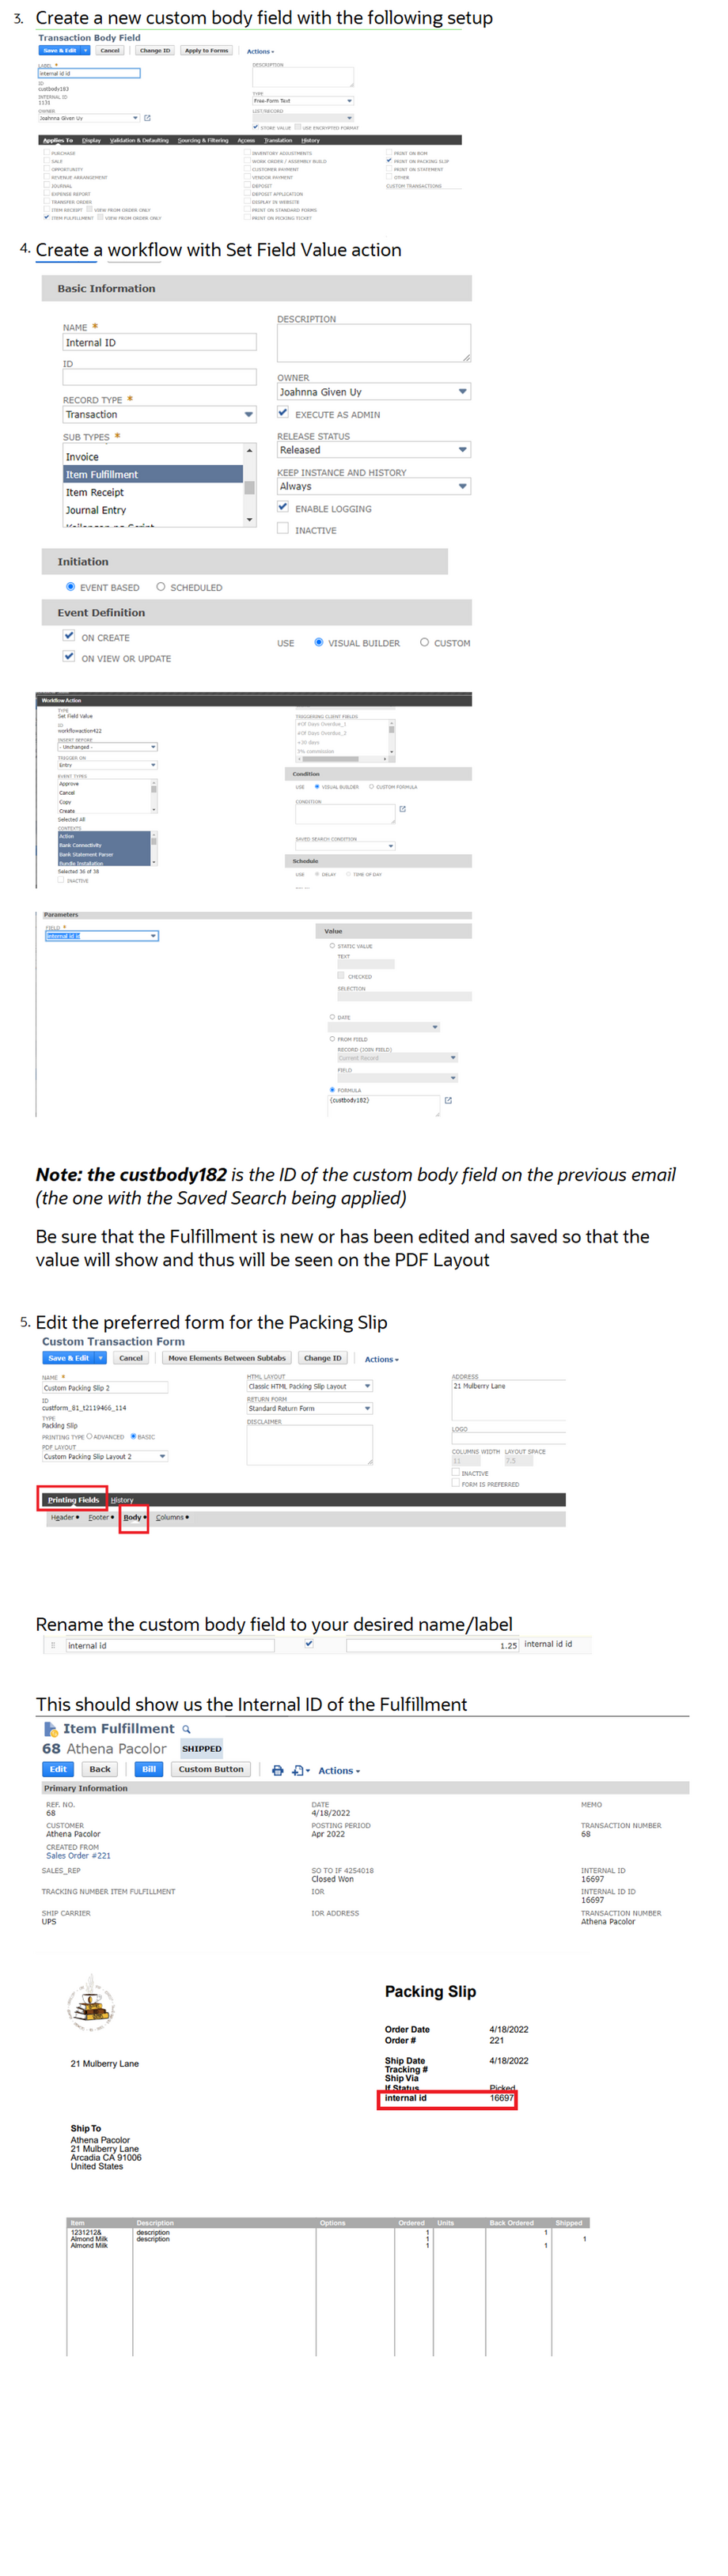
2. Create a Custom Body Field
1. Navigate to Customization > Lists, Records, & Fields > Transaction Body Field > New
2. Enter Label
3. Type: Free-Form Text
4. Store Value: Uncheck
5. Applies To: Item Fulfillment
6. Click on Validation & Defaulting
7. Search: Select the Saved Search created above
8. Click Save
Feel free to share us about your thoughts and tips 😊

Re: WARNING Manual Update Required to Electronic Bank Payments SuiteApp 2022.1
Hi all,
A final update from me is that Oracle have advised the text below and so the good news is that it is only likely to affect a limited number of users.
Haydn
The problem was that in the past you have installed an incorrect Electronic Bank Payments (EBP) bundle. This could have been done by just searching for Name and missing out the bundle ID and description mentioned in SuiteAnswers documentation. It was a version 2020.2 QA (bundle ID 315896) which purpose was purely for testing and it cannot be used in production accounts. The solution was to perform a manual bundle update to get the correct newest production version of the EBP bundle. This is not happening normally, so other customers were not affected. When using the correct EBP bundle in production, it is being automatically managed (updated) and no changes are done by the update. For Sandboxes though, a manual update is required every time with the upgrade to newer Netsuite version.
Re: Question regarding Dashboard Tiles
Are you referring to the Dashboard Tiles "Bundle" # 185219? I know it is called a SuiteAp but it is found in the Bundles.
If so you might start with SuiteAnswer ID:65560. There are several links at the bottom of that Answer you may want to read through.

There is also information in the Help Center
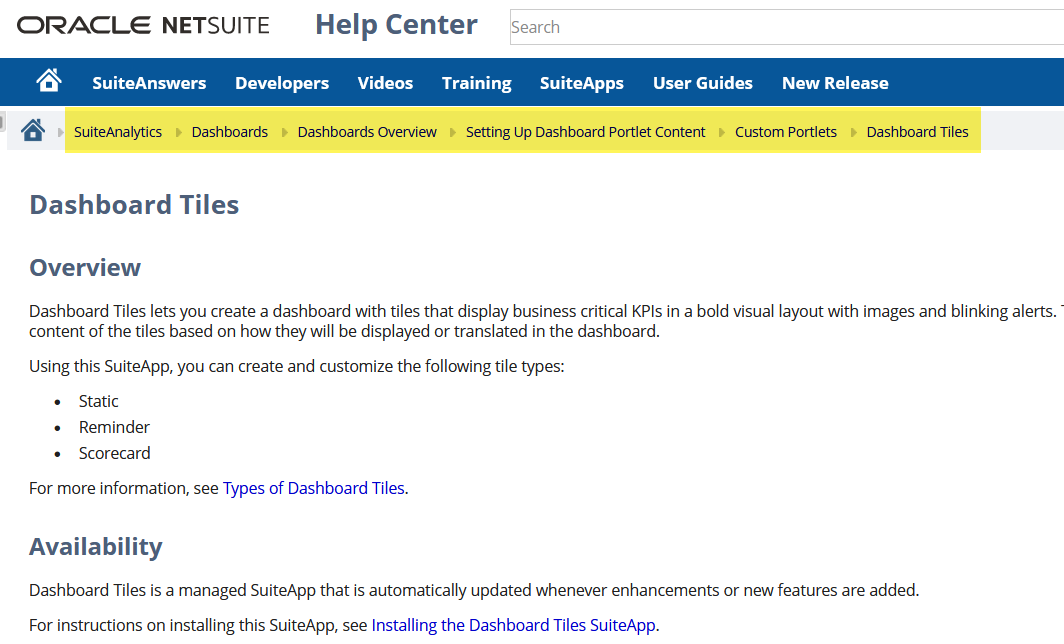
Bottom line is I think you need to design what you want, first.
 CDuf
CDuf
Re: Question regarding Dashboard Tiles
Hi @Karanjot Singh,
From your home screen you should be able to select Personalize Dashboard from the lower left. From there the tile should be visible, for selection, on the SuiteApps tab.
John

Re: Display the customer name once enter customer id and vise versa
Hello @Amjad Kasem,
To do this, we need to edit the two Custom Fields in the Custom Record. The setup that we will do is the one where the user will select the Customer then the Customer ID will be sourced to the second Custom Field.
Kindly follow the steps below:
- Edit the Custom Field that will contain the Customer Name
- Copy the ID
- Type: Select List/Record
- List/Record: Select Customer
- Click Save
After this, edit the second Custom Field:
- Edit the Custom Field that will contain the Customer ID
- Store Value: Remove checkmark (please do note that removing the checkmark will delete all the past values in the custom field)
- Click Validation & Defaulting
- Default Value: Enter {<ID>.entityid} (replace <ID> with the copied ID from the first Custom Field)
- Formula: Enter checkmark
- Click Save
Let me know if you have questions.

NSC | Avoid Looping in Workflow Set Field Value Applied on Custom Form

Using a Set Field Value Workflow Action on Custom Forms will often result in an endless loop of the record. To avoid this, we need to apply a Workflow Condition on the Workflow Action. Kindly follow the steps below:
1. Edit the Workflow Action
2. Add the following condition:

Note: Replace Standard Sales Order with your preferred Custom Form. On my Scenario, I selected Standard Sales Order in the Selection under Parameters since this is the Form that I am using in the Set Field Value.
In the Selection column, select the Custom Form selected under Parameters (In my scenario, I used Standard Sales Order, hence the condition).
4. Click Save
With the condition, the Workflow will capture the value in the Custom Form and it will not execute again which will prevent the loop.
Let me know if you have questions.
NetSuite Admin Tip | Chart of Accounts > Guide in Merging Accounts

1. Accounts should both be Active
Scenario:
Merge 001 ABC Bank - Checking (Active) to 002 ABC Bank - Savings (Inactive).
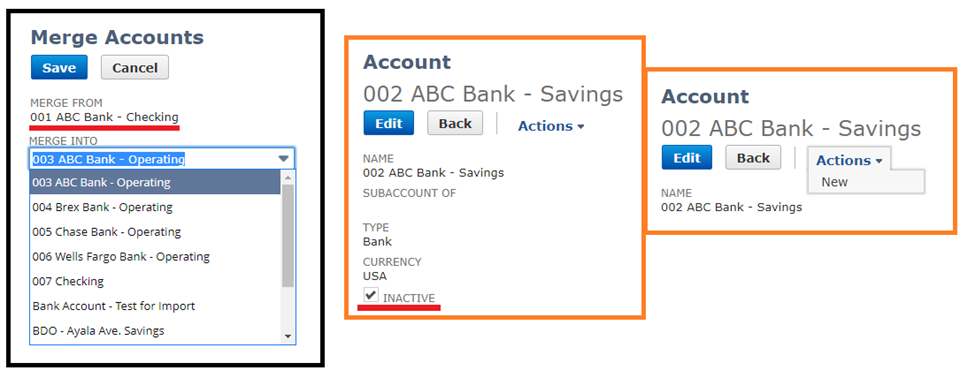
As you can see, on the Merge Accounts page, the inactive account is not on the Merge Into dropdown list.
If you view the Account Record for the inactive account record, you also will not be able to see the Merge button under Actions.
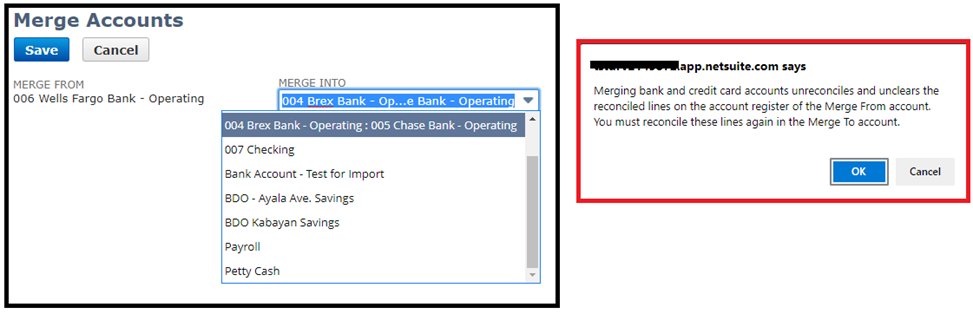
2. An account with sub-account/s can be merged with another. However, if it is a bank/credit account make sure you take note of the warning message before proceeding
Scenario:
Merge 003 ABC Bank – Operating to 004 Brex Bank - Operating with sub-account 005 Chase Bank - Operating
3. An account cannot be merge to a summary account
Scenario:
Merge 001 ABC Bank – Checking to 007 Checking (Summary Account)
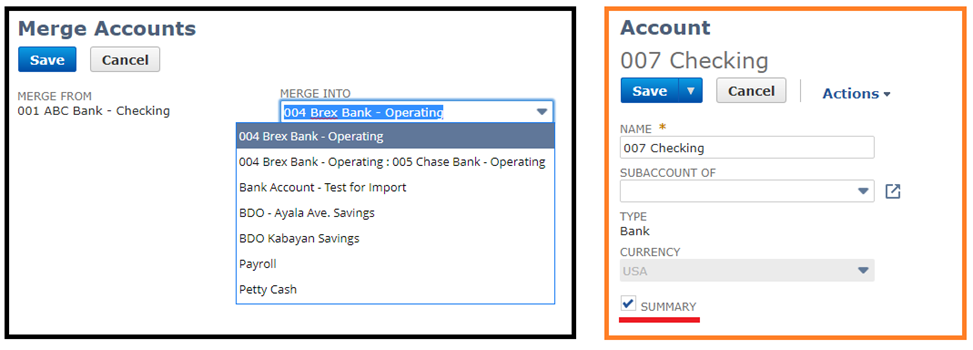
As you can see, 007 Checking account – a summary account, will also not be available on the Merge Into dropdown
4. Accounts to be merge should have the same Account Type, Currency and Subsidiary
Scenario:
Merge Z-001 Account and Z-002 Account with different subsidiaries
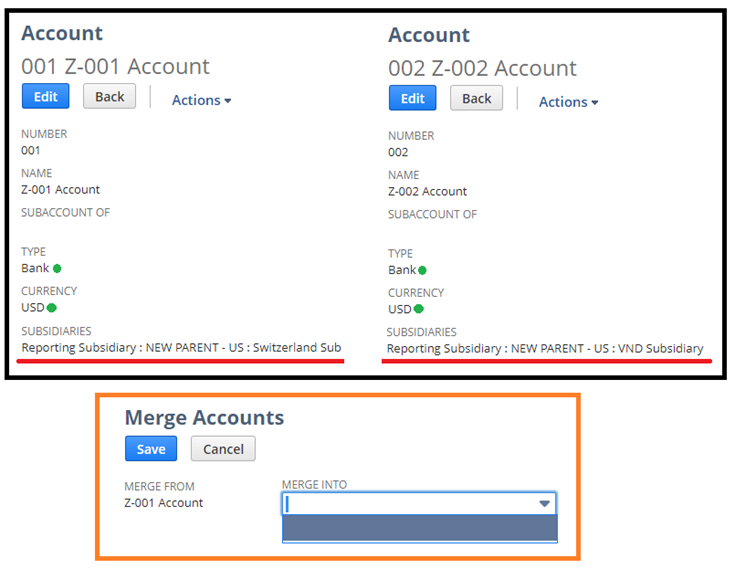
The criteria has to be met. This is why the account cannot be seen on the Merge Into dropdown list although the accounts has the same Account type and currency.
5. These accounts cannot be merged:
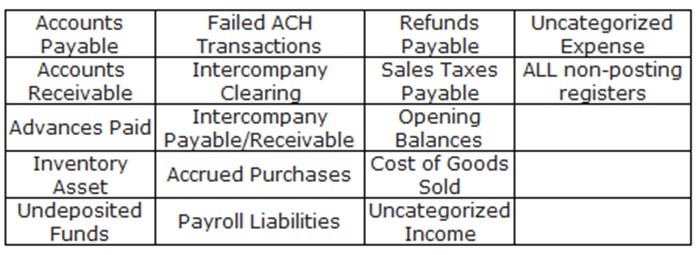
Hope this helped!
Are there any other tips about account merging that you would like to share? Comment on the thread and let our members know.

Re: Assembly Build - Lot Number field not showing as a list
Hi @John Griffin, thanks for sharing your insights on this! ?
----
Hi @KNason76,
I found a related enhancement request for this one which you can vote for in the SuiteIdeas page:
- Enhancement # 168834: Transactions > Manufacturing > Build Assemblies > Components: to have a pop up list to show the lot number/serial numbers that the item have
I have confirmed that you can only get a list of Lot Numbers in the Inventory Detail popup. Using Bins is not mandatory for this, but Advanced Bin/Numbered Inventory Management feature should be enabled for the Inventory Detail to be available.
-Ivy
=========================
If you find this reply to your question as helpful, others with the same question might find it helpful as well. By marking “Yes” on the “Did this answer your question?”, you’ll be able to help other community members who might have the same concern find the answer easier and you will also get closer to earning your next Answer Accepter badge.
